Posted on

A “Library” Easter Dress

Sadly, I never got around to making my Valentine’s Day pumpkins. I promise I will procrastinate Halloween again so I can carve some hearts in February! Since I’m touching on other major holidays in this post, how about I cover Easter too!

I had to settle for making a dress for the girl child since I procrastinated on those pumpkins so long they ended up in the trash….a shame really. I didn’t get fun or food out of them this year. I totally didn’t slack on the Easter dress though. I dug through my stash of patterns a whole week before Easter! Woooo! Go me! I was deciding between the Oliver + S Garden Party dress or the Library dress. I even put it to a vote on FB but came up with a draw. So, I asked the 2 year old in the house. She grabbed the pattern and said “This one mommy.” There was no way to refuse that. So, the Library Dress it is!

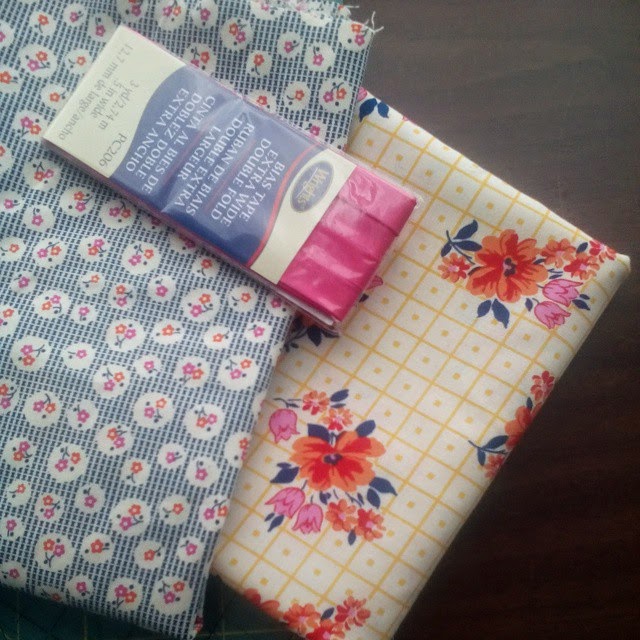
The next day the little miss and I hit up the store and got our material. I have tons of fabric in my stash but not enough of a main fabric for the pattern and who doesn’t love buying new fabric. I didn’t think to write down the good info on the fabric though.

 The pattern has a view with a collar and without, and short or long sleeves. I went with no collar and I decided to omit sleeves completely since it was a week before Easter and it was already in the 90’s here. I didn’t want to add extra bulk by lining the entire bodice so I opted for double fold bias tape to finish the sleeves.

I went to town transferring the pattern and cutting everything out. I prefer to make clothing a bit longer for kids who are growing so quickly so I made the size 2T pattern but went with 3T in length. Except for a few small errors in the directions when it came to piecing the waistband to the bodice, it was easy peasy. Pleats are not my favorite thing in the world to sew, but there were not that many and I do love the look.

 Then, I got to the part where I had to pin the sides of the skirt together and finish the sleeves….something was off. I don’t know if it was a mistake I made or something to do with leaving the sleeves off, but the skirt was not lining up by a half inch. I even hit up the forums on the Oliver + S site to see if anyone else had that particular issue. I didn’t really get much response (not that I expected it though). In the mean time, the dress just sat like this while I tried to figure out what to do.

In the end I just decided to cut off the offending half inch from the arm hole and call it a day. Everything lined up beautifully after that and my little miss kept begging to put the dress on.


I love the buttons down the back too. On the forums, some of the others out there kept talking about putting a zipper in. I don’t think I would like the dress as much. As they say….it’s the details that make the dress. I still have not figured out who “they” are but since they are backing me up on this, I’m going with it!


And a shot of all the kids and while I did do Easter baskets before the egg hunt, I totally forgot to bring them to their grandparent’s house.


Here are some close up shots of the details and the fabric as well.

Dress Front

No Collar and I used the contrasting fabric for the facing.

 The piping to edge the waistband matches the arm hole bias tape.

Dress Back

Buttons.

I loved making this dress and can’t wait to make it again. Going with a different view to get a different look. I have some great corduroy sitting in my stash that would make a great winter dress with the long sleeves….

Posted on

Little Boys and Bow Ties

Time to revive the blog! I have been away for a few months. Major life changes going on here. We moved cross country and now live in Arizona. We have been here since the end of July. All I can say is that it is HOT in August in Arizona, but this winter has been beautiful! It is the end of January and I have my windows and doors open and it is hitting around 73 -75.

After much inner turmoil I put the boys in public school. I’m a firm believer in the Montessori method of learning and very much against common core and testing and every single thing about public schools really, but we just couldn’t swing the funding here in AZ for Montessori. I gave homeschooling a go from the fall through Christmas time. It worked in the sense that I could use Montessori on them at home, and that they were learning TONS, but I was drowning. And my super social boys were having trouble not interacting with more people on a daily basis. I have them in soccer, and swimming, and we go to the gym 3 times a week, but it was not enough. I will keep our home classroom up and running to supplement school…and I will bite my tongue and clench my teeth while dealing with their terrible common core crap homework because this ended up being the best choice for our family.

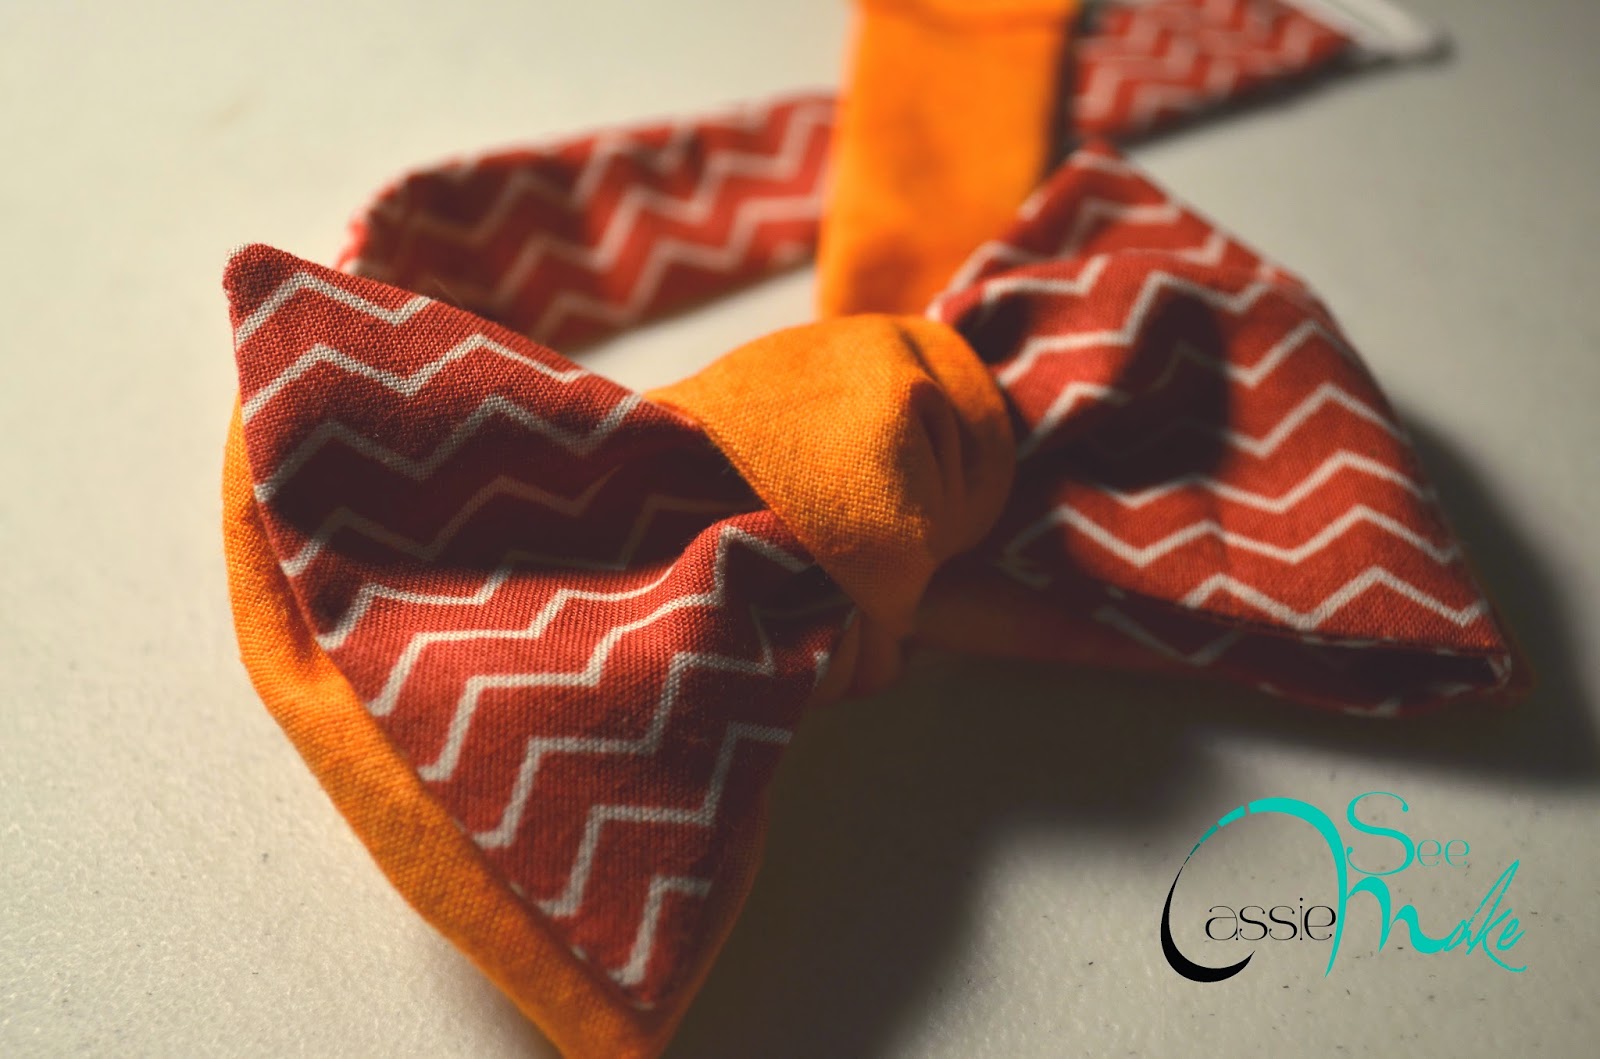
Now, after that crazy long intro and background info, my middle child came home from school yesterday and said that he had to dress like he was 100 years old for the 100th day of school. Really?!?! I need more notice! Anyway, I pulled out a short sleeved button down top for him and I remembered this blog post with a free bow tie pattern. I got the okay from the middle child for a bow tie with a request that it be red. So, I dug through my piles and piles of scraps and I whipped up an awesome bow tie! Now that I see how easy that was, I will be making a bunch more! I made the ones with the clip in the back so that once it is tied, it is tied.

Some gel and baby powder in his hair turned it that lovely grey/white color and I popped the lenses out of an old pair of sunglasses.

If I do say so myself, my 100 year old kindergartener turned out pretty cute with his “red” bow tie.

Posted on

Star Wars Art Smock

Way back in the middle of September I made a bunch of bias tape. I made it so I could make Hugh an art smock for school. It should have been done way back in August but I was having trouble figuring out exactly how I wanted to make this. I wanted it to ‘grow’ with him and easy for a 6 year old to get on and off. I also have a very opinionated boy who very much had a say on the fabric choices.
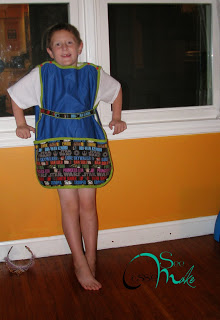
This is what we ended up with…..front
 

Back…

 I have tons of PUL fabric for making cloth diapers/covers. So, I used that for the body of the smock. It is completely water proof. Nothing is getting through it. To get the shape, I just laid out a t-shirt of Hugh’s and traced out the neckline and arm holes (making a point to add a couple of inches for growth). Then we went through my stash and Hugh picked the Star Wars fabric. That was a good choice because I had a blue to match it in the PUL. I would have done a black or a blue bias tape but Hugh wanted Yoda green. The Star Wars fabric has been divided into 3 pockets.

As for the belt, well it was the best way I could come up with that would be easy for him to put the smock on and off himself. It has snaps to adjust the size. The belt is attached to the back part of the smock and then wraps around the front, holding everything together.

 The back is completely plain

Posted on

Halloween Costumes

I know, I know…this post is coming a bit late. I have been both busy and a slacker.

This year I mainly focused on Miss Faye’s costume. Owen decided to go as Superman…which Hugh had done a couple of years ago so we already had that one. Hugh decided to go as Wolverine, but not the cartoon Wolverine, the movie Wolverine. So, I hit the store and bought him a muscle shirt and the claws. Easy and done. For Miss Faye, I decided to make her a ghost. I kept seeing the tutu ghost costumes all over and I knew that would be easy and adorable so that is what I did.

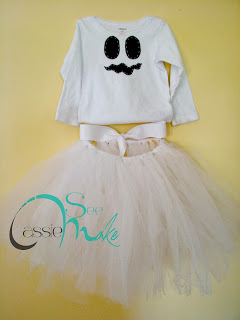
The tutu skirt was easy. I just bought 2 yards of tulle and cut it into strips. I know you can buy it in the 6 inch roll but it cost more that way. The strips were just looped around a piece of ribbon. Easy and done.

 If you look closely you can see sparkles. I did splurge on one roll of glitter white tulle. I only put a few pieces in the skirt as it was really stiff and scratchy.

 For the top, I used a long sleeved white onsie that we already had in Faye’s drawers. I added eyes and a mouth out of black scraps from my stash.

 I put a quick and easy running stitch around the edges in white to make it stand out.

 Here I am with Miss Faye in her costume. I didn’t get very many pictures that day. I’m thinking I will dress her back up to get some better pictures. As you can see I made myself up with a sugar skull. If it had not been raining and gross I would have attempted fun clothes to finish the look.

….and here we all are, heading out to trick or treat in the rain. Don’t mind that Owen does not have red bottoms on. I had them but we could not find them anywhere.

ETA…I took some pictures of Faye in her costume. She moves around so much that these were the best I could get.

Posted on

A Birthday Dress…Ice Cream Style!

Somebody turned 1! How in the world did time fly by sooo fast?

I of course had to make a birthday dress for Miss Faye. I bought fabric a few months ago that I just loved and knew I had to use (the one on the right is the main fabric, I also got the blue to go with it…the red was for a different project).

 I just never really found a pattern I liked. Then I got busy with life and almost decided to not make a dress at all. Well, I decided the day before her party that I was going to make a dress and that I would again make the Ice Cream dress from Oliver + S. I just made one a couple of weeks ago that turned out GREAT! There are a couple of different style options for this dress. I decided this time to go with the color blocking option. I added a top layer again (I really wanted to show off the fabric that I got a few months ago. I had the royal blue fabric that I had picked up at JoAnn’s, and I also had a beautiful light teal that I had picked up at Hobby Lobby. I still needed 1 more color to pull off the color blocking so I dragged all 3 kids to a local quilt shop after I picked the boys up from school. There, I picked up a great jewel tone royal purple by Michael Miller from the Krystal collection.

I got home and tossed my new fabric in the wash at around 4:30 pm. Then it was dinner and bed time for all the kids…by the time I sat down to start the dress it was 11:30 pm. The party was at 11:00 am the next day. I knew I was going to not be sleeping much if I wanted to pull this off.

I cut and pieced and sewed and altered the pattern to suit my vision…then I sewed some more. I had to go crash around 2 am. Faye woke up at 5:30 to nurse so I got back up after a much too short nap. I fed her and then went back to sewing. The house started waking up around 7:45 or so. I had to pause to wake up Mr. Cassie so he could take care of the kids…the dress was not done. I also called my mom to come over and help with the kids and party set up. I went back to sewing. Around 10:30 I stopped to go jump in the shower so I could sort of look presentable for the party. I got out of the shower, got dressed and then still had to finish the dress. I was sewing the button on as the first guest arrived. And what a lovely button it was!

I kept the little ‘V’ notch in the collar this time

 …and the color blocking with the overlay turned out adorable!

 The party was great…the weather was perfect, and Miss Faye looked awesome in her new Ice Cream Dress.

We of course took it off of her for cake…we don’t want to mess up such a cute dress!

All in all, it was worth it. I would stay up late again working my butt off for her. She is totally worth it. She fits into the madness that is our family sooo well!

Happy First Birthday Miss Faye.