Posted on

Lamp Upcycle

If it doesn’t move then paint it! I have already talked about my obsession with painting. Well, I have been a bit stressed out lately with volunteering projects and upcoming birthday parties to plan and money issues (don’t we all have money issues). Anyway, changing something or refreshing an existing item always helps my mood.

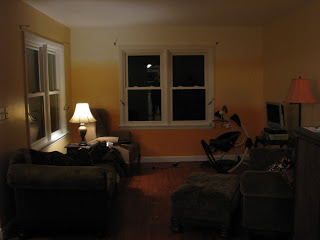
I have recently painted my living room. It went from brown to orange. Well, the brown lamps do not match anymore and I have been meaning to change that. What a better way to destress than to paint?!?

Here is the before lamp in action. It is not the best picture of the lamp, but really, who takes pictures with the lamp in mind. This is the new orange ombre paint job. I’m going to eventually have shades of grey in the room (the floor will get painted and I hope to reupholster the furniture), so the brown lamp had to go.

Here is the lamp out in the yard all taped up and ready to be primed. I made sure to wash it really well to get all the dust out of the cracks. I wanted the paint to adhere properly. I just used an empty plastic flower pot to stand it up out of the grass and…

…sprayed away. I did 3 very light coats of primer. If you get too heavy with spray paint then it will drip.

By that evening it had dried enough for me to do the next step. MOD PODGE! I love mod podge! For this project I took an old book that had no value and that we would never read again and I ripped a few pages out. I went to town getting those on the lamp. G happened to hop in the shower when I started and I was able to finish before he got back out. So, don’t let the time hold you back from experimenting with mod podge.

I only did the middle section because I was going to paint the rest of the lamp a nice dark grey color. I let the mod podge set over night to dry and then after I took the boys to school  I taped over my work. I didn’t want any paint on this part. I’m sure there was an easier way to cover this part but I had the tape on hand and, well, it worked.

Two light coats of a dark gray glossy spray paint…

a little drizzle, and a mad dash to get the lamp in the house before all my hard work got ruined….

….and I now have an awesome lamp that totally clashes with it’s former lamp shade! I need to get a new one of those still!

Cost of project…$3.44 for the gray spray paint. I had all the other supplies already.

List of supplies to refinish a lamp….

Lamp
Spray Primer
Spray Paint
Painter’s Tape
Old Book
Mod Podge (this comes in all sorts of finishes, I used a high gloss one)

Time to refinish lamp….

Not counting drying time – 1 hour.
Counting drying time – 1.5 days

I will watch garage sales this spring and summer to find a nice white lamp shade that needs a new home.

And a gratuitous aren’t my kids/weeping cherry tree, beautiful, picture!

Posted on

Painted Table

When my oldest was about 3 he took to stabbing the table with his
fork. I realized that instead of fighting him all the time I would just
get a different kid friendly table. I hit up all the garage sales in the
area and got a great table that came with 2 leaves and 6 chairs.

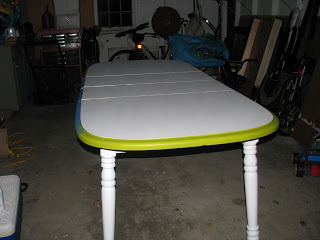
I sanded and primed the table then painted the entire thing white. I painted the edge of the table green and blue..

Next, I found a fun stencil and got a few more colors of paint. I covered the entire top of the table with the stencil.

While it was fun, it was just a bit too bold….Here is the entire top after I completed the stenciling.

I toned it down a lot buy dry brushing more white over the top and the edges.

After that I put around 5 coats of poly on.

And finally in the newly painted dining room (I will put a post up soon with these pictures).

I still need to paint the chairs. I am planning on painting each one a different color to match the colors in the table.

Posted on 1 Comment

Painted Crib

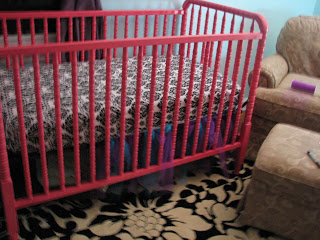
I promised a post about the pink crib in Miss Faye’s room. I love color and I love to make my world a  bit more colorful with paint, so I paint everything….and I do it often. There is no better excuse to paint than finding out you are having a girl after 2 boys. The first thing I did for the new baby’s room was to paint the crib pink (a little side note about the color pink….I strongly dislike the color for little girls. It has been over used soooo much, but I just could not find a color that went with the rest of her room. So, pink it is).

 It did take a few steps to get to this and to make sure that it would be baby safe, but like I said before I am obsessed with painting and love to do it!

Step one: acquire a crib. I bought a new Jenny Lind style crib (we had to trash the crib the boys used because it was a drop side and the company refused to send parts to convert it). Anyway, the crib needed a couple coats of primer first.

Step two: Primer….I used 2 cans of this.

Step three: Paint…I think I used 6 cans of spray paint.

Don’t forget to flip it over and paint both sides!

Step four: seal everything with a spray polycrylic.

Step five: Realize that maybe you should have painted the room before you painted the crib because now you have no where to put the crib!

Here is the crib now in Miss Faye’s room.

Posted on

Inspiration

I have been spending lots of time on pinterest and I came across a blog. I have fallen in love with everything that she sews. The clothing that she makes her daughter is to die for! Not only was her blog an inspiration for this one but an item that she sews her daughter all the time was my inspiration for this….

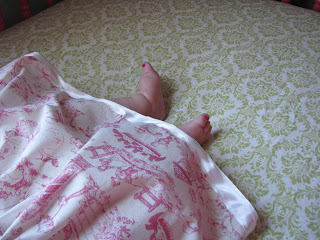
It is the oliver + s lazy days skirt. I can see why she makes this all the time! It only took me around a half an hour and I used up extra supplies just lying around my sewing area.

The skirt is made from one piece of fabric edge to edge with some elastic at the waist and a ribbon for trim at the bottom.

Miss Faye looks adorable in it! I can see myself making MANY different versions of this skirt!

As Miss Faye gets more mobile, the photos are getting harder to take though!

As a side note, you can see that Miss Faye’s crib is pink…I will get a post up soon showing that project!