Posted on

Lamp Upcycle

If it doesn’t move then paint it! I have already talked about my obsession with painting. Well, I have been a bit stressed out lately with volunteering projects and upcoming birthday parties to plan and money issues (don’t we all have money issues). Anyway, changing something or refreshing an existing item always helps my mood.

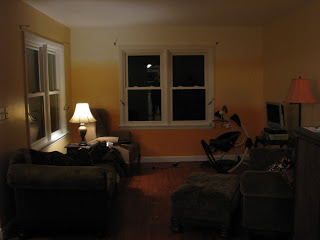
I have recently painted my living room. It went from brown to orange. Well, the brown lamps do not match anymore and I have been meaning to change that. What a better way to destress than to paint?!?

Here is the before lamp in action. It is not the best picture of the lamp, but really, who takes pictures with the lamp in mind. This is the new orange ombre paint job. I’m going to eventually have shades of grey in the room (the floor will get painted and I hope to reupholster the furniture), so the brown lamp had to go.

Here is the lamp out in the yard all taped up and ready to be primed. I made sure to wash it really well to get all the dust out of the cracks. I wanted the paint to adhere properly. I just used an empty plastic flower pot to stand it up out of the grass and…

…sprayed away. I did 3 very light coats of primer. If you get too heavy with spray paint then it will drip.

By that evening it had dried enough for me to do the next step. MOD PODGE! I love mod podge! For this project I took an old book that had no value and that we would never read again and I ripped a few pages out. I went to town getting those on the lamp. G happened to hop in the shower when I started and I was able to finish before he got back out. So, don’t let the time hold you back from experimenting with mod podge.

I only did the middle section because I was going to paint the rest of the lamp a nice dark grey color. I let the mod podge set over night to dry and then after I took the boys to school  I taped over my work. I didn’t want any paint on this part. I’m sure there was an easier way to cover this part but I had the tape on hand and, well, it worked.

Two light coats of a dark gray glossy spray paint…

a little drizzle, and a mad dash to get the lamp in the house before all my hard work got ruined….

….and I now have an awesome lamp that totally clashes with it’s former lamp shade! I need to get a new one of those still!

Cost of project…$3.44 for the gray spray paint. I had all the other supplies already.

List of supplies to refinish a lamp….

Lamp
Spray Primer
Spray Paint
Painter’s Tape
Old Book
Mod Podge (this comes in all sorts of finishes, I used a high gloss one)

Time to refinish lamp….

Not counting drying time – 1 hour.
Counting drying time – 1.5 days

I will watch garage sales this spring and summer to find a nice white lamp shade that needs a new home.

And a gratuitous aren’t my kids/weeping cherry tree, beautiful, picture!

Posted on

More Bloomers

Yesterday, after I made Miss Faye the new skirt I also made her a pair of bloomers to go with this pinafore. They are the same bloomers that I made to go with this, only this time I did add the elastic to the bottom of the legs. I also added a cute little ribbon bow.

She is wearing a shirt that my mom saved from when I was a baby. 

I still need to get pictures of her in the bloomers and the pinafore but the top was in the laundry already.

I think next time I will make the bloomers a bit shorter. These are knee length and just a bit too long. I may add some butt ruffles next time as well!

I really love these because they are simple and they are roomy enough to
fit her cloth diaper. They are also easy on and off to change said
diaper.

Here is a quick pic of the fabric I picked up to make her another outfit. I just can’t decide what to make, another pinafore/bloomer set or a dress or something completely different. I have been scouring the internet looking for cute patterns. I did find one that I liked but it was much too expensive so I still have my feelers out.

Posted on

Another One!

I had to do it. I made another Lazy Days skirt. Miss Faye loves it. I used extra fabric I had from these wash cloths. I am officially out of elastic now and I have been having trouble finding it in bulk. I specifically like 5/8″ braided and for some reason that one is not that easy to find. It also looks like my little Miss is going to have red hair!

Posted on

Pinafore Part Deux

I got busy and made another pinafore. I really love this pattern!

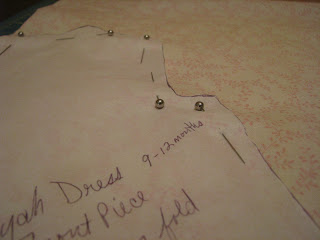
I had to pin the pattern today because my chalk wheel ran out of chalk. Of course I had just been to the fabric store the day before. Oh well, it only added a few minutes. If you don’t remember from the cutest pinafore ever post, I am in love with this pattern. It is from Sew Sweet Patterns and is called the Mayah Reversible Pinafore and Bloomers.

There are only a few pieces to cut out and sew together, so I decided to try my hand at some applique using the fabric from the reverse side.

Let me tell you. I am terrible at using the freehand satin stitch on my sewing machine. It turned out okay but my perfectionist type personality keeps telling me to rip it out. I think I will leave it in and then get some more practice….I need a baseline to see if I’m getting any better.

Anyway, the top is done and looks amazing!

And these next two pictures keep turning when I upload them and I can’t turn them again. You get the idea though!

 Now for the best part….the fashion show!

It is still a bit big on her. I did make the next size up, hoping it would fit the entire summer. You can really tell in this pic. I really do love the fabric as well. The pale creamy butter color looks good with her complexion.

Here is the other side.

Posted on

The Best Venison Chili Ever.

I have a weakness for chili. I think I have always loved it. I will admit that I was really picky when I was little and only ate the meat out of it, but I have grown up and the more chunks the better!

I make chili for our family about once a week so I have gotten pretty good at it. I don’t use the packaged seasoning mixes since they all have gluten and tons of chemicals in them. Plus, it maybe takes about 20 seconds longer to put together your own seasoning. I didn’t take pictures of every step…just the end result.

I used just over a pound of meat…I cubed two venison steaks and a couple of pork chops and tossed them in the pan to brown (I used 1T. of bacon drippings for this as the venison is so lean that it drys out without some nice fat). I then added a can of red beans, two cans of tomato sauce, 1 can of diced tomatoes, 1/4 cup beef stock, and all my seasonings. I let it simmer for a bit and hit the cutting board. I chopped one sweet onion and one bell pepper. In a separate pan I sauteed the peppers and onions until they were soft and the onions were almost translucent. At this point I added them to the meat mix and kept on simmering.

I really want to stop using canned tomato products. We have a veggie share from a local farm for the summer and we have our small garden in the backyard. Between the two, I hope to can enough tomatoes to get us through next winter and spring.

Now that I went off on a tangent, let me get back to my chili.

Here is the picture of The Best Venison Chili Ever

….and for the actual recipe….

1-2 lbs. cubed/ground/shredded meat (pork, beef, venison, turkey, chicken, etc..)
1 bell pepper
1 sweet onion
1-3 jalapeno (however much you want for your preferred amount of kick)
1 can diced tomatoes
2 cans tomato sauce
1 can red beans
2 T chili powder
1 T garlic powder (or 3-4 cloves)
dash of oregano
dash of red pepper
1 t. cumin
salt and pepper to taste
1 – 2 T bacon drippings or butter (we are dairy free so no butter here)
1/4 c. beef stock

Cube venison steaks and a couple of pork chops and tossed them
in the pan to brown (I used 1T. of bacon drippings for this as the
venison is so lean that it drys out without some nice fat). I then added
a can of red beans, two cans of tomato sauce, 1 can of diced tomatoes,
1/4 cup beef stock, and all my seasonings. I let it simmer for a bit and
hit the cutting board. I chopped the sweet onion and the peppers.
In a separate pan I sauteed the peppers and onions until they were soft
and the onions were almost translucent. At this point I added them to
the meat mix and kept on simmering.

You can top the chili with some nice fresh avocado for a yummy creamy texture.

Enjoy, I know we did!